Last night I asked me husband which color he would love in our bedroom. After just a little bit of thought he said, "Green." I gasped and said I had been thinking about the color green a lot lately and had considered painting our entertainment center green and getting hardware to make it look like a campaign dresser. Not exactly what he was thinking, but at least we had the right color. We both like a true green color, not dark and not bright limy or pastelly. True green is gorgeous!
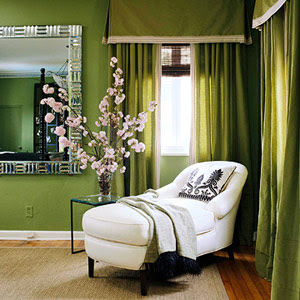
After much thought I don't think the color green will be making a big appearance in our bedroom, but I thought I would look at some green room inspiration.
There is a weird thing that my mother has done and I found out I do now. I would come home from school and find her closet carpet ripped out and it turns out she just got the desire to rip out the carpet and that was it. So, you go out and get new carpet.
Yesterday, I came home and while my husband was talking to me I started ripping off the fabric from our bedroom lamps. I wanted to see how the shade underneath had held up and it looks perfect, but you can feel the adhesive spray on it when you touch it. Well now he has a table lamp that is half skinned and it does not look pretty. That now means. . . we are looking for bedroom lamps sooner than we had planned.
So today I got to looking. I don't want to spend over $50 on each lamp, but I might be crazy to say I don't want to spend more than $40 on each. So, here are my current options:
In all honesty, I only really like the first one from Pier 1 and I might be a bit naive to think I will take my first trip to HomeGoods and find the exact lamps I want for the price I want on my first try. I've heard you need to check this store regularly to find the gorgeous lamps and furniture that everyone scores, but I am hoping the decorating gods will smile down on me and grant me this one little want.
My little sister and I have been discussing decorating her room. The few ideas she did have I was completely on board with and the rest I put together based on what I thought she would like and what would look good.
She was set on white furniture and cute knobs for her desk. I loved both of those ideas and they were easy to create the entire design around. I wanted gray wall so she could make colorful changes easily, but loved the bold pink and orange colors as well as smaller accents of turquoise and gold. I also took into account that she has her own stuff (snow globe collection) that she would like to add to the room, so I left room for additions.
Tonight I show it to Girlfriend (my little sister) for her approval and then we move to the deciding factor, my mom. We'll see how this goes.
Sorry for yesterday's absence. I've had a bug that decided to stick around for a bit.
Now, I have been (almost) patiently waiting for May 1st because that is when Target will launch its Calypso St. Barts limited edition line. I have been obsessed with their home line. It's colorful and, as Target always is, inexpensive. Check these out!
One of these elephant teapots is on my list- only $12.99!
And one of these glass bud vases for only $4.99
These pillows are only $24.99
I am so tempted to get one of these poufs for only $59.99! That's ridiculous!
Can you believe this line? May 1st I am hopping online and getting to purchasing.
Our headboard is finally complete, and we LOVE IT! We chose a gray color because we wanted a neutral base that would allow us to change out our bedding to whatever we wanted in the future and it would always look good. Centsational Girl's tutorial I found to be the most helpful out of the many tutorials out there. She gives an easy step by step with helpful pictures. Check out her tutorial here.
Know that you do not need every tool in the world. We used our Ikea toolkit and borrwowed my Dad's drill. Lowe's cut the wood for the headboard and the legs for FREE because they were straight cuts.
Here is what we purchased and the dimensions (for a full):
- 1/2" plywood- 55x29
- 1" foam- 55x29
- batting- "twin", it was plenty for us to double layer (at least six inches larger than your foam/wood measurements)
- fabric in dark gray- 70x 41 (add 12 inches to foam/wood measurements and then a couple more inches for your buttons)
- staple gun w/ staples
- plastic buttons- I wanted 2 rows of 4 (button maker included)
- brackets
-nuts and bolts
Making the buttons was my favorite part because they were fun, easy and looked professional when I was done.
First, mark where you want your buttons to be on your plywood and then take a super small drill bit and drill the holes.
We laid out the plywood, and put the foam on. We used spray adhesive because we had it on hand and it ended up being necessary becauase we had to add extra foam at the bottom of the board. It was nice to have the foam secured when we flipped it over. You can't tell when you see or lay on the headboard that the foam isn't one smooth piece.
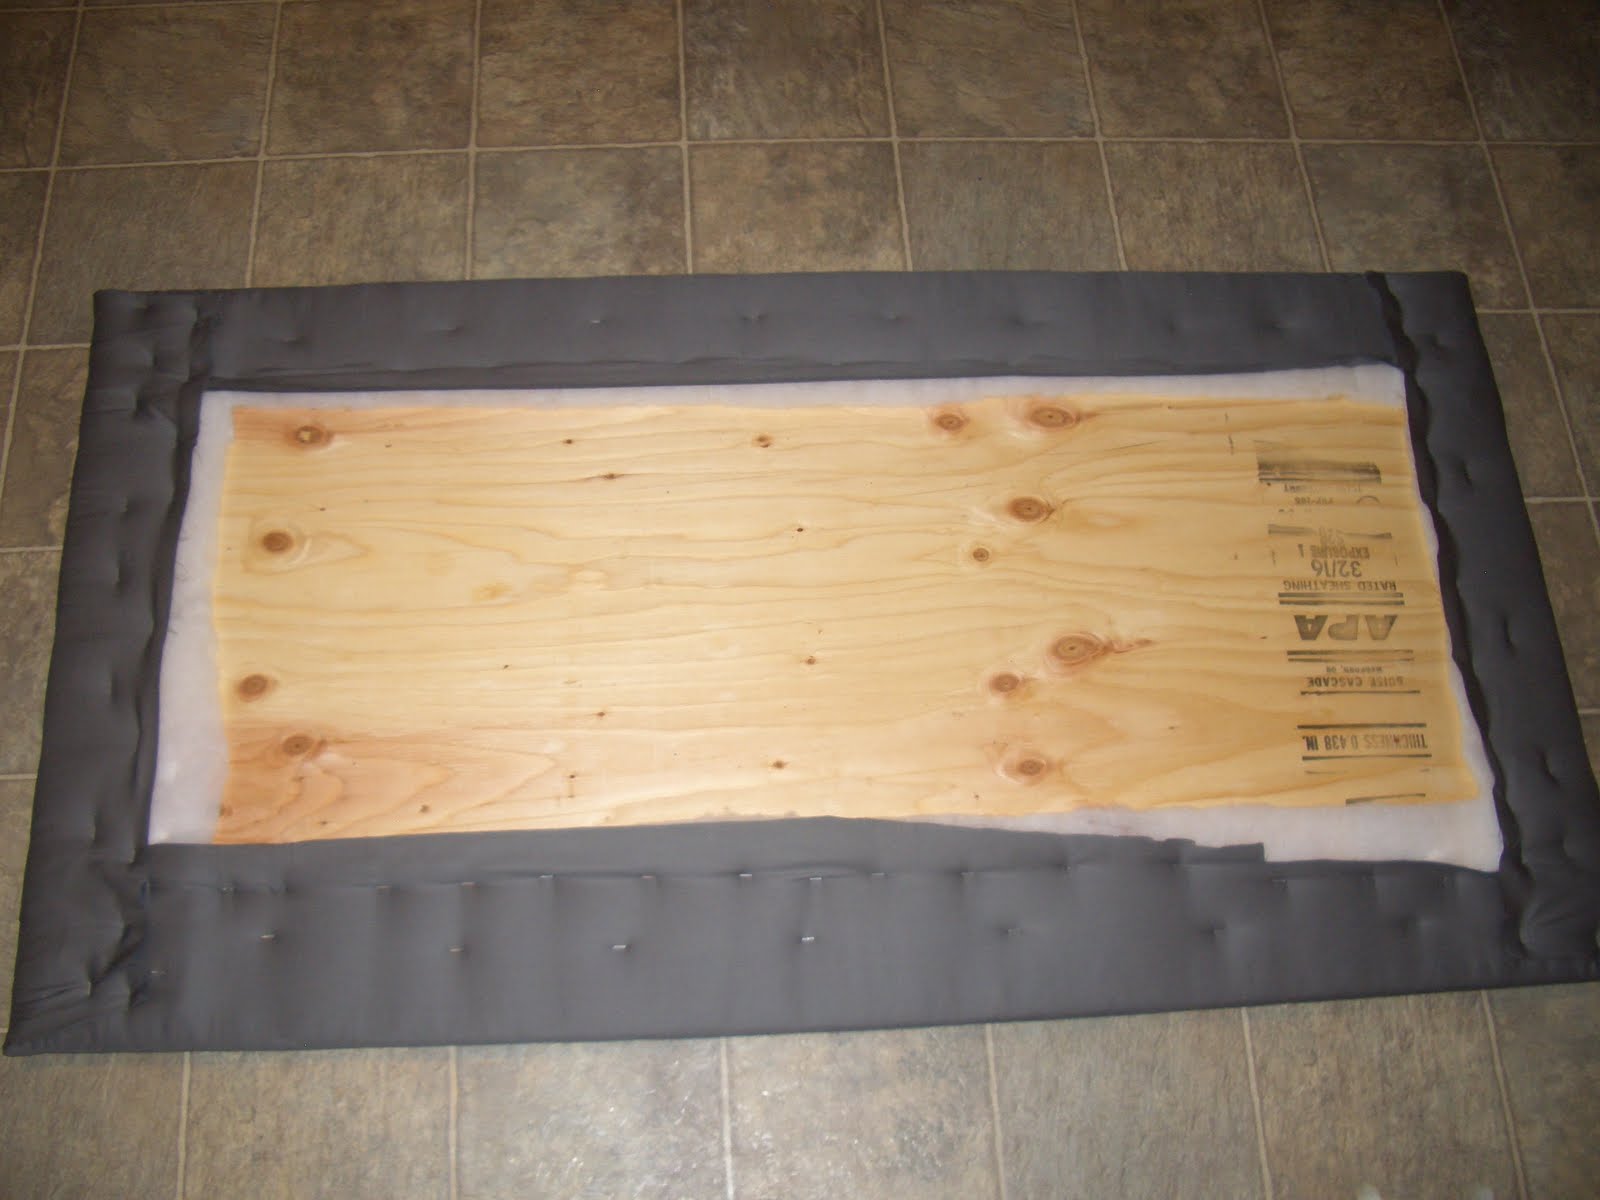
Once your foam is on, lay out your batting on the floor. Make sure it is flat or you will be able to see the wrinkles through your fabric. Flip the foam headboard over and place it face down on the batting. Wrap the fabric around and staple it starting from the middle of the top and bottom and then do the sides. It is helpful to have someone holding the other side so you can both pull tight. Next, lay out your fabric, place your batting headboard on top of the fabric, wrap the fabric around and staple it the same way you did the batting.
Here is what it looked like before we put the buttons on.
The buttons were a bit difficult because my staple gun started to wig out on me. You take a threaded needle through one of your pre-drilled holes in the back of your headboard, pull it through all the layers to the front side, string the button through and thread the needle back through (you will have to find the hole through all the layers). I then stapled the tail of the thread in a zig zag pattern anywhere from 5-8 times, I stapled until I felt the thread was tight. You then push the button on the front as far to the wood as you can get, tighten any thread slack and then tightly staple in a zig zag design like you did with the other end of the thread. I didn't take any pictures of this part, but know it doesn't look pretty, but just make sure the thread is tight. It would also go faster if you had a helper.
Now, on to the mounting. Most tutorials I've seen just mount the headboard to the wall. We are renting and will be moving to another rental in 4 months so we decided to mount ours to our bed frame.
We bought some brackets and used our extra wood scraps to create our own thin versions of 2x4s. We simply measured our bed frame where we would be mounting and measured on our headboard. We then drilled our holes for our bracket screws and and went to town. NOTE: you can't drill through the actual headboard because the fabric gets caught and twisted in the drill. We just took a small nail and hammered our own holes. When we then screwed the screws in, the fabric did not snag at all.
We did some more drilling in order to attach the bottom of the legs to our bed frame and attached the headboard with some nuts and bolts. Wa La! We were done. It's easier than I might have made it sound.
Check out the where we started with our bedroom and what the finished results are.
Before
Then this before
To this final before
(we placed tape on our wall where we would like our headboard to be and then measured it)
To the after
My husband and I love it, not only because it's gorgeous and perfect for our room, but we built it ourselves!
Yesterday was a Monday, but an ill Monday. I absolutely hate being sick and, while my husband got sick for a day and a half, he got me sick for 2+ more days and counting. He's stronger than I am. I'm a big believer that if I don't act sick than I will not be sick, or be less sick. So, no one at work knew I was sick, but come lunchtime my husband walks into my office with my lunch and flowers.
It made me miss him more when he left, but made my day at work so much better.
I was so excited to try out my new green glass tumbler that I mentioned here
In order to stick to my monthly design budget, I buy items over each month to make sure I am buying exactly what I want. So, over the last few weeks I made a trip to Ikea and scored myself some files, drapes (which I returned), a bookshelf and legs.
Then, our lamp for our console table arrived. . .
We love how it looks, but you will have to wait for the console table reveal.
Next item of business, my in-laws arrive this week for my husband’s graduation. So I’m trying to get the last of the little things put together which required another trip to Ikea, of course. My biggest goal was to get a plant, some flowers and picture frames. Friday, though, I was checking out Ikea’s new products and I almost fell off my chair when I found it. . . the perfect throw. Da da da!!!!!
I have been looking for the perfect throw for a while now and, whether they were cheap or stinking expensive, all of them lacked soft texture, cuteness/style and bold and bright color.
Once I spotted the throw in store I made a bee-line for the stack and instead of picking up the blue, which I thought I was going to buy, I snatched up the pink. Yes, it is a girlie pink, but I couldn’t pass up that bright happy color. I began telling my sister all the reasons why this was the perfect throw and pretty sure I ended up selling 3 throws to ladies around us who overheard me yapping about them.
With a budget you have to play a little give and take. I held off on some bigger frames and the plant I wanted in order to get the throw. I am more than happy with my choice. So, with all the recent deliveries lately, our console table is almost complete. Just a couple more pictures and what not. I will show you the finished product later this week.
I did break in the throw though with a Sunday afternoon read-a-thon. It is so soft, the perfect thickness and I would hand these out to every passer-by on the street if I had the cash to do so.
Here are the flowers/plant and lacy plant pot I picked to bring a little bit of spring into our home.
We also finished the headboard this weekend! It turned out great! I'll post pictures tomorrow.


